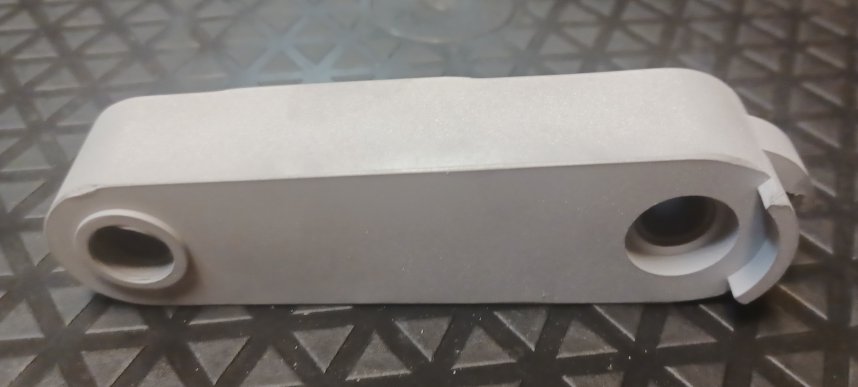
Tacx Flux Tension Arms
previous listing: https://www.ebay.com/itm/333883015069?hash=item4dbcfa7f9d:g:qjcAAOSwC71gIS6q
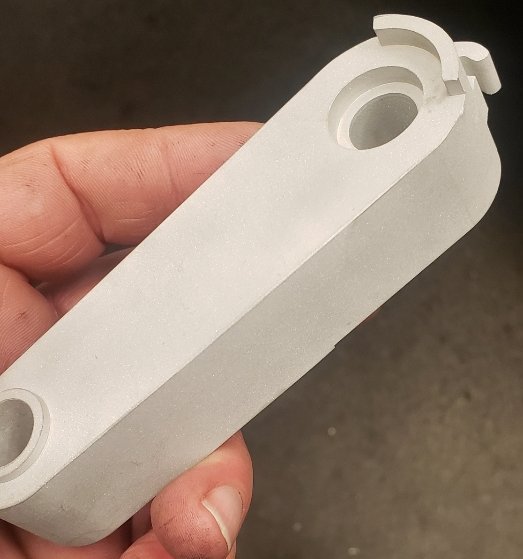
These Tension Arms are CNC machined from 6061 aluminum to perform and last much longer that the original plastic arms.
We have also inserted bushings inside both shaft holes for smooth operation and long lasting durability... especially in an environment that's exposed to sweat being blown into the trainer.
There have been people who say bushings are not necessary but anyone who's tried to pull a steel seatpost out of an aluminum frame after it's set a while will tell you differently.
Steel and aluminum don't play well together. Steel against aluminum is subject to considerable galvanic corrosion.
One can argue given the small degree of movement makes it's unlikely to coorde much but question is... So, if you're spending 50 bucks on a replacement part, why take the chance when it's so easy to fix?? So, we have bushings.
CAUTION: If you didn't know it already, opening your Flux will void your warranty. If you are still under warranty, best thing is to have Tacx fix your issue.
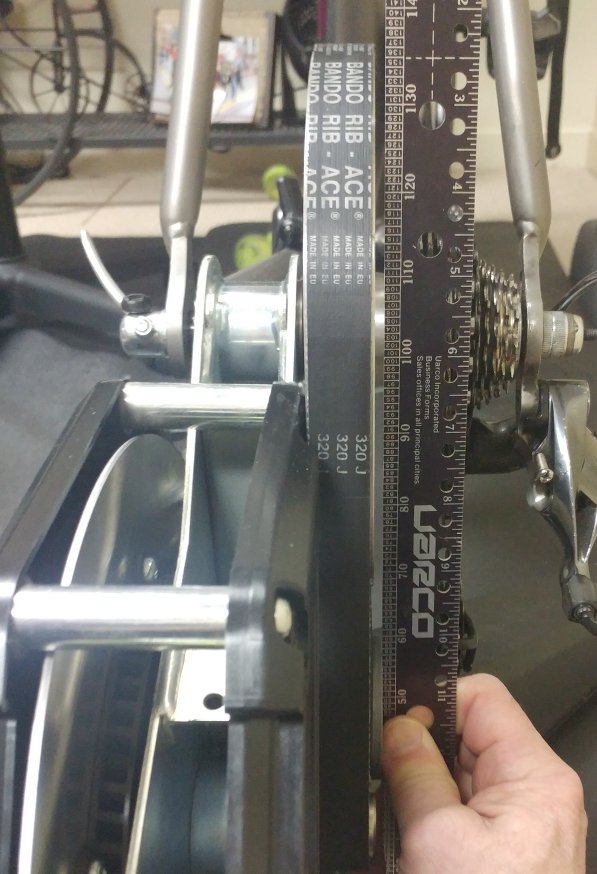
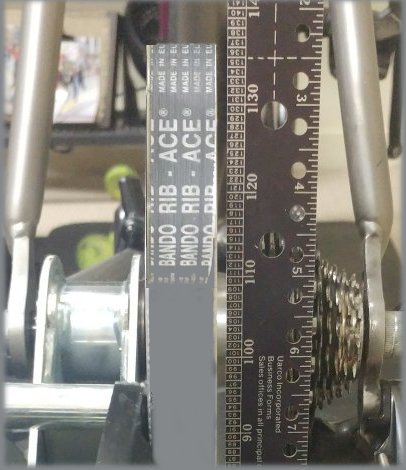
Checking Your Tension Arm
To check your tension arm for proper alignment, remove the drive-side case and hold a stright-edge against the idler pulley like the image on the right. The gap between the straight edge, belt, and pulley wheel should be constant. If not, it's most likely your tension arm is bent.
The picture to the right shows the alignment after installing one of our aluminum tension arms.
Quick Belt Check - Flip It
My Flux used to make a ton of noise when I first got on it. Then about 10 minutes or so of riding, it would stop... or at least close to stopping. I was messing with it and found if I "flipped" the belt so it ran the opposite direction
(same direction for the trainer). If you stand on the flywheel side and look at the writing on the belt, it's right-side up. Take it off the pulley and turn it around so the letters are upside-down when looking from the flywheel side.
It may make a difference, for a while anyway, but it's a good indication that you're going to need a belt soon. I don't recommend belt dressing as it usually a temporary fix and gums things up after a while.
Verifying Size of Axle/Shaft
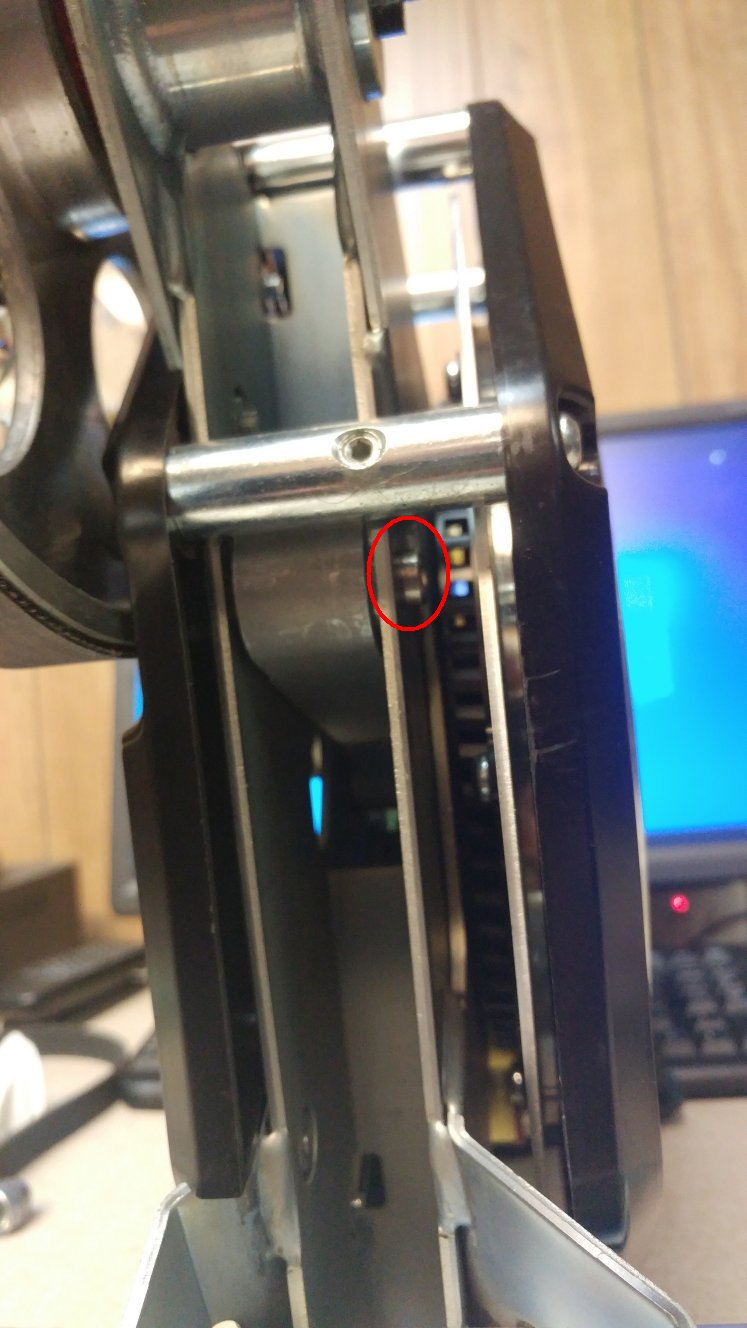
There are different sizes of shafts in the Flux. To get the correct part, you need to check the diameter of the shaft. To do that, you'll need to take off the outer panels.
The picture to the right shows the end of the pivot shaft, MEASURE HERE.
- Put a 10mm open end wrench (spanner) over the shaft. If it goes over, you need a 10mm (Typical)
- If 10mm won't cover, try 11mm and see if it fits over the shaft. If so, you need an 11mm
- If a 10mm and 11mm are both too small, then see if a 12mm will go over the shaft
Make sure you masure only this end of the shaft and order the specific size you need.
The end of the shaft you want to measure is circled in Red in the picture on the right. --->>
Handy Tip - Don't put it all back together
After you have removed the outer covers to check the size of the shaft, you don't need to put them back on to ride! Just put the legs back on and leave the covers off until your new part comes.
That way you don't lose time disassembling everything when you get your new tension arm. Although, be careful if you're a sweater!
Dissembly of the Tacx Flux
There are many videos and tutorials on how to disassemble your Tacx Flux. Simply Google "Tacx Flux Repair Video" and you should find plenty.
Since there are so many videos, we'll just summarize the steps here in photos with key points identified.
Disassembly Steps »
Reassembly of the Tacx Flux
Reassembly Steps »
SERIOUSLY: It may look a little intimidating but if you can work a screwdiver and whack a punch with a hammer, it's a piece of cake.
It will take about 20-30 minutes to disassemble once you've done it before and know what to expect. Just take your time, watch where the screws go, and look forward to some quiet riding!